When you build your own fly rods, sending them back when they break is a very short trip.
It is certainly true that a life-time warranty can save your life and that of your fly rod. But it does take time, usually some negotiations, and occasionally an up-front cost. On the other hand, if you made the rod yourself, (See reposted Blog entry below) sending it back for repair means back to your own work room.
To retrieve my favorite 7 piece 5 weight travel rod, sadly snapped in an upper section, I stumbled across a suggestion in the http://www.rodbuildingforum.com to use a chunk of carbon arrow made of the same material, the same way and what appears to be the same wall thickness as our graphite fly rods except on a constant diameter rather than a tapered mandrel.

The broken pieces are made to snugly fit inside the piece of arrow using thread draped over the ends rather than masking tape and then epoxied. This will work for breaks only on certain upper sections of rods, but this is where I always break mine. The guys at RMSGear Archery Supply in Denver are also fly casters and were more than happy to cut me a couple pieces from their scrap box at no charge. Don't try cutting it yourself because it shatters and the dust is probably carcinogenic.
Here is a photo of my light weight emergency fly rod mending kit. The glue is to melt on a rod tip when it breaks off in the first section. The mended section is shown below the samples. So far so good. It seems to cast just the same. Now I'll try it on an 18 inch brown (I'm wishing.)
 |
| I used the pack bay finish for both the bonding the sleeve over the broken rod and costing the thread wrapped ends of the patch. |
 |
| After coating the sleeve with the epoxy finish and letting it rotate over night using the Weber motor described below. |
 |
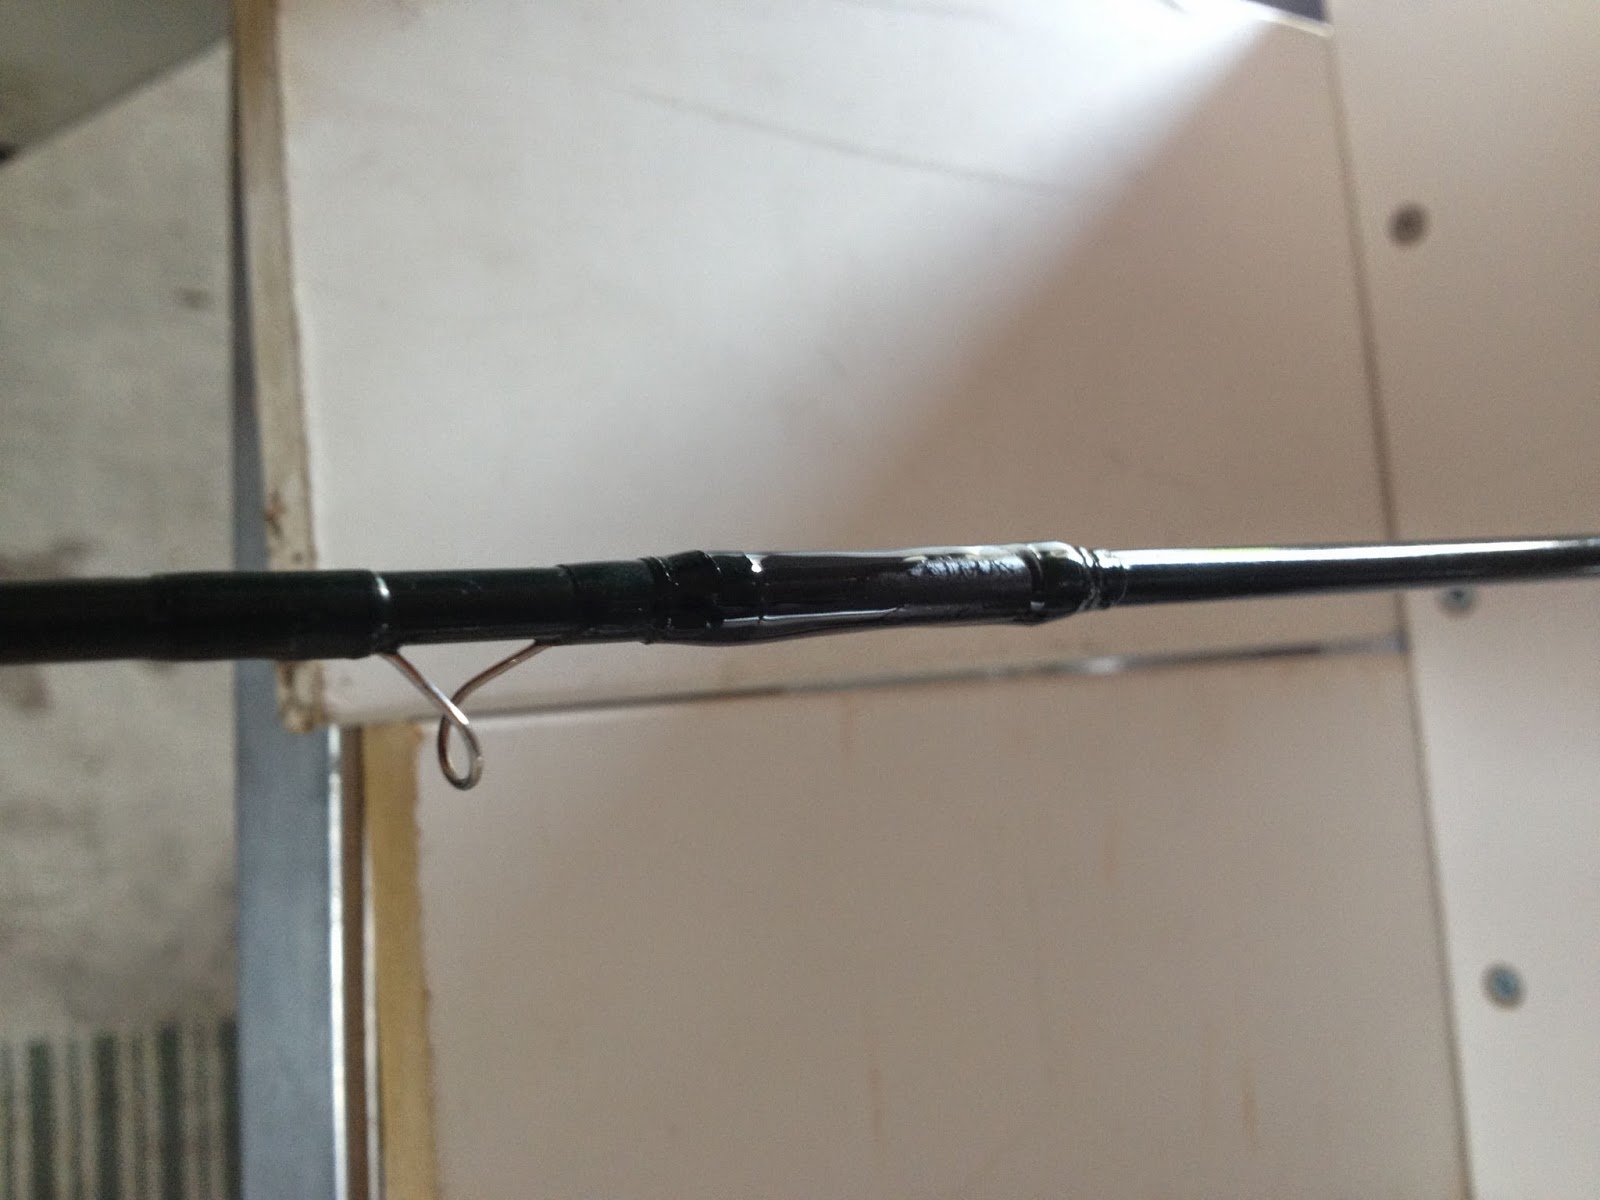
| I took the time to label the rod this time printing a label on a black background in white letters, affixing it with clear packing tape, wrapping the ends and then epoxying over it and letting it turn for a night. |
Updated: Duncan Knots and Wire Ties to the Rescue
 |
| The brilliant Duncan knot secures the foot for wrapping things up. |
Building your own rods is actually a lot simpler than Orvis or the Scott pro would have you believe.
You need just a couple objects normally found around the home.
- A rotisserie motor from your Weber grill, with a hunk of 3/8 square bar stock stuffed into a pierced rubber card table caster. See Photo.
- Newspaper to catch the spills of epoxy.
- Toenail clippers and a 5 pound barbell.
 |
| Make it youself wrapping station and tools. |
Everything else either comes in the rod building kit or you can order a la carte on line at places like Hook and Hackle. Hand built fly rods make great gifts, especially for people who otherwise would not have sufficient guilt or motivation to come fishing with you.
As far as skills go, you don't need any. What you need are these two tricks that I'm about to give you. One I invented myself, thank you very much, and the other came from the storehouse of cheap, quick, and dirty tricks for parsimonious people, The Rod Building Forum.
Figuring out where to place the guides on the blank piece of graphite can take hours and over 5 shots of single malt. Screw this up and you might as well use a hand line. Formulae based on Newtons Third Law, F1 = F2 but opposite, don't exist and the cookbook tables that come with the kits have no idea how you are going to fish the rod.
Wire ties to the rescue. After you have found the spline of the rod, epoxied it to the cork grip and rod seat, masking tape it to a coffee table with the reel installed. Then guess at the number of rod guides you're going to use, make small loops, and slip them on the rod. Thread the rod with your fly line through these faux guides, and stretch the line out to about the spot where you normally break off big fish and tie the line to the barbell. Then go back and slide the ties to a places where the line runs as close to parallel as possible to the bend of the rod. Then just mark the rod with a lead pencil at each wire tie, undo the whole thing and write down the measurement to each rod guide location.
 |
| Anchor the loaded rod vertically. |
 |
| Wire ties simulate rod guides for perfect placement on your loaded rod. |
The next biggest challenge is attaching the rod guides to the rod while you wrap them. Thanks go to Perchjerker in the above mentioned rod building forum. He/she suggested using 15-25# monofilament and a Duncan Knot. Brilliant. They are moveable for alignment and when you are ready to take them off, the toenail clippers snap them off faster than a Skylark bartender on ladies night.
The final challenge is marking the rod. You need to do this because after your 6th or 7th rod you'll lose track of their provenance. Further more, when it inevitably falls off the top of your car as you drive away from the creek, or gets lost with your luggage, you may get it back if you've put contact info on the rod. Should you find your lost or stolen rod in the hands of an unauthorized user, it will give you cause to use your carry permit. I'm trying an ink jet printed label stuck fast to a clear piece of USPS package tape smoothly wrapped around the rod, then wrapped with guide thread at both ends and covered in epoxy finish. I'll post a photo if it works.
 |
| Weber motor, 3/8 sq bar, card table footie and masking tape. |
UPDATE 7/14/2014 - Labeling the rod is still a royal pain for me.
The use of the clear packing tape is marginally OK. You have to measure the circumference of the rod where the label will go, set the width of the label to that size (I use Apple Preview, Tools, Adjust Size). Using a background color close to the rod color seems to work better than printing on a photo background.

In making a 10ft 4Wt for granddaughter Eloise, I couldn't find the wire ties, so I just used more Duncan knotted 25lb monofilament. It actually worked ok and I skipped one step by not having to mark the rod where the guides went. The rod turned out to be 10ft 4 inches because I used the first section, rod seat, and cork handle of another rod that I made but broke a few years ago. I built up the first section of the rod with masking tape, just as I would have for slipping the reel seat over a fly rod blank, but instead I epoxied it inside a new 9 ft wt blank making the rod now 10 ft 4 inches long.
In making a 10ft 4Wt for granddaughter Eloise, I couldn't find the wire ties, so I just used more Duncan knotted 25lb monofilament. It actually worked ok and I skipped one step by not having to mark the rod where the guides went. The rod turned out to be 10ft 4 inches because I used the first section, rod seat, and cork handle of another rod that I made but broke a few years ago. I built up the first section of the rod with masking tape, just as I would have for slipping the reel seat over a fly rod blank, but instead I epoxied it inside a new 9 ft wt blank making the rod now 10 ft 4 inches long.